

Table of Contents
- What You'll Need Before You Start Mending
- Choosing the Right Patch Material for Heavy-Duty Fabric
- Step-by-Step: How to Repair Torn Work Pants and Jackets
- Material-Specific Repairs: Denim, Canvas, and Ripstop
- What Belongs in a Heavy Duty Fabric Repair Kit
- Sewing Techniques for Outdoor Gear: Field Repairs and Quick Fixes
- How to Repair Torn Work Pants and Jackets: Adhesive vs. Sewing
- Common Mistakes That Weaken Your Repair
- Frequently Asked Questions
Last Updated: September 19, 2026
What You'll Need Before You Start Mending
Good repairs start with good prep. A torn knee or blown-out elbow usually shows up at the worst time, often mid-season when replacing gear isn't in the budget.
Gather your tools before you touch the tear. A basic setup covers most jobs:
- Needle and thread sized for heavy fabric
- Sharp scissors or thread snips
- A patch material that matches the garment
- Thimble, pins, and a seam ripper
- Iron and ironing board for heat-set patches
Check the Occupational Safety and Health Administration guidance on protective clothing if your workwear serves a safety role at your job. A home repair should never weaken gear that protects you on site.
Clean and dry the repair area first. Dirt, oil, and debris can interfere with adhesives and make it harder to create a clean, secure repair.
Choosing the Right Patch Material for Heavy-Duty Fabric
Match the patch to the fabric weave. Too light and it rips free; too stiff and it cracks and pulls at the stitches.
Heavy-duty fabric falls into a few common types. Denim is a twill cotton weave. Canvas is a plain, tightly woven cotton or blend. Ripstop uses a grid of reinforcing threads that stops small tears from spreading.
Here's a quick guide:
Fabric |
Best Patch Type |
Why It Works |
|---|---|---|
Denim |
Cotton twill or denim scrap |
Matches stretch and weight |
Canvas |
Heavy cotton duck |
Same weave, holds stitches |
Ripstop |
Ripstop nylon patch |
Matches the grid structure |
Insulated shells |
Nylon with heat-set backing |
Seals without bulk |
For denim and canvas, cut the patch with the grain running the same direction as the garment so the fabric doesn't pull oddly once sewn.
Trim the patch to extend at least half an inch past the tear on every side.
Step-by-Step: How to Repair Torn Work Pants and Jackets
The best method depends on the tear. A clean slit on a flat panel is easy; a blowout at the knee needs reinforcement.
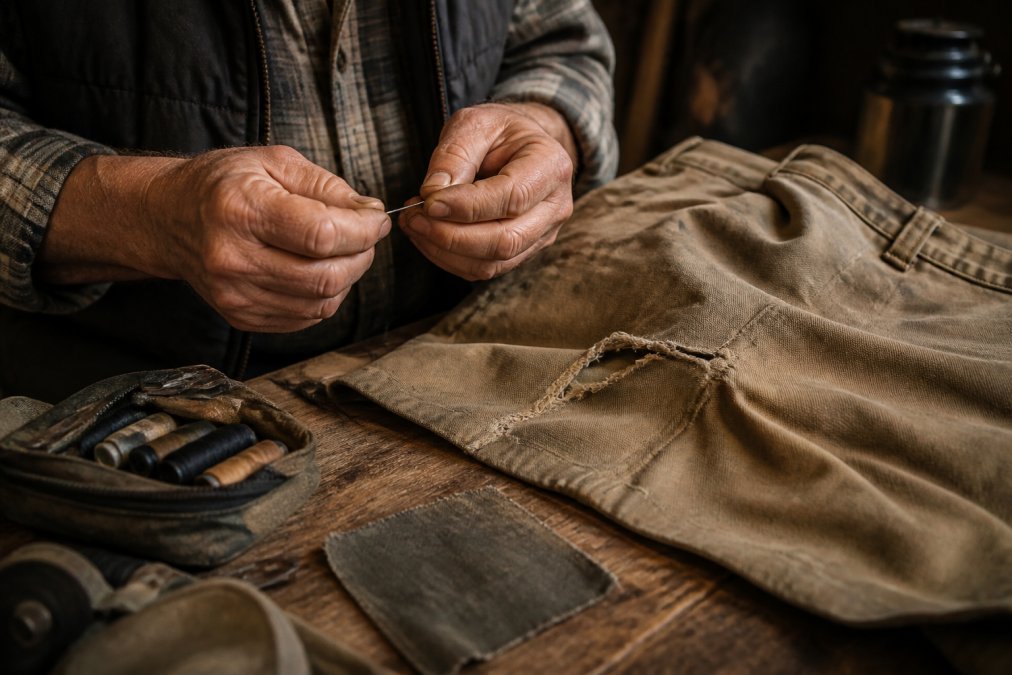
Here's the basic process:
- Turn the garment inside out and smooth the torn area flat.
- Trim loose threads and any fraying edges.
- Cut your patch to size with a half-inch overlap.
- Pin the patch in place on the wrong side of the fabric.
- Thread your needle with heavy-duty thread and knot the end.
- Stitch around the patch edge using a whipstitch or running stitch.
- Knot off on the inside and trim the thread tail.
- If the garment's care instructions allow ironing, press the repaired area as directed for the fabric or patch being used. Avoid applying heat to materials or finishes that aren't heat-safe.
Whipstitch vs. Running Stitch: Which One Holds
The whipstitch wraps thread over the fabric edge, locking raw edges down and resisting fraying. Use it on seams and edges that take a lot of pull.
Reinforcing High-Stress Areas
High-stress areas fail first. Knees, elbows, pockets, and belt loops all take a beating.
Material-Specific Repairs: Denim, Canvas, and Ripstop
Different fabrics need different handling. Treat canvas like ripstop and your repair fails in a week.
Rack & Ridge | Insulated Hooded Duck →
What Belongs in a Heavy Duty Fabric Repair Kit
A heavy duty fabric repair kit saves a trip home. Keep one in the truck, one in the pack, and one at deer camp.
Build your kit around these items:
- Heavy-duty needles in a few sizes
- Waxed thread in black, brown, and tan
- Fabric scraps of denim, canvas, and ripstop
- Iron-on patch squares
- Small scissors and a seam ripper
- Thimble and a few safety pins
- Mini latch hook for pulling threads through thick fabric
Sewing Techniques for Outdoor Gear: Field Repairs and Quick Fixes
Field repairs buy you time. They aren't meant to last forever, but they get you through the day.
How to Repair Torn Work Pants and Jackets: Adhesive vs. Sewing
Most guides tell you to sew and move on, leaving out readers who don't own a thimble, don't want to learn a whipstitch at 5 a.m. before a shift, or are patching a jacket in a motel room with a travel iron. Adhesive repairs are a legitimate option for workwear. They just have rules.
Factor |
Heat-Set Iron-On Patch |
Liquid Fabric Adhesive |
Hand-Sewn Patch |
|---|---|---|---|
Time to finish |
A few minutes with an iron |
Minutes to set, hours to cure |
15 to 45 minutes depending on tear size |
Tools needed |
Iron and a pressing cloth |
Adhesive, weight or clamp |
Needle, thread, thimble, scissors |
Best on |
Flat panels, small to medium tears, lightweight shells |
Small tears, frayed edges you want to lock down, non-flexing areas |
Knees, elbows, seams, belt loops, anything that flexes |
Weak point |
Edges lift after repeated washing if the patch is undersized |
Stiffens fabric, can crack at flex points, may fail in hot dryers |
Takes practice to keep stitches even |
Wash durability |
Good if edges are stitched or sealed |
Fair to good depending on the product and cure time |
Best of the three |
Reversible? |
No, heat-set adhesive is permanent |
No, cured adhesive is permanent |
Yes, stitches can be removed |
How Heat-Set Patches Actually Bond
Iron-on patches use a heat-activated thermoplastic adhesive on the back. When the iron hits the recommended temperature, the adhesive softens, flows into the fabric weave, and re-hardens as it cools. The bond is mechanical, not chemical, grabbing the fibers it can reach.
- Use a pressing cloth between the iron and the patch so you don't scorch the face fabric or melt a synthetic shell.
- Hold firm pressure for the full time the patch instructions call for.
- Let the patch cool completely under a weight before you move the garment. The adhesive sets as it cools, not while it's hot.
- Round the corners of the patch before you press it. Square corners catch on things and peel first.
- After it cools, run a row of stitches around the perimeter if the garment gets washed often.
When Liquid Adhesive Makes Sense
Liquid fabric adhesives cure into a flexible film. They work well for small tears, locking down a frayed edge before you patch over it, and repairs in spots that don't flex much, like a jacket's back yoke or a flat pant leg panel.
When Sewing May Be the Better Choice
A stitched repair flexes with the fabric because thread and cloth bend together.
The Hybrid Approach Most Tradespeople Land On
Tack the patch in place with adhesive or a few pins, then stitch around the perimeter. You get the alignment benefit of adhesive without relying on it for strength. The stitches carry the load. The adhesive just keeps the patch from shifting while you work.
Common Mistakes That Weaken Your Repair
Most failed repairs come from a handful of avoidable mistakes. Fix these and your patch outlasts the garment.
- Patching over dirt or oil, which stops adhesive and thread from bonding
- Cutting the patch too small, leaving no seam allowance
- Using thread that's too thin for the fabric
- Stitching through a pocket or zipper channel
- Pulling stitches too tight, which puckers the fabric
- Skipping reinforcement on high-stress areas
- Ironing synthetic fabric on high heat and melting it
Frequently Asked Questions
What is the best stitch for repairing heavy-duty workwear?
The best stitch depends on the fabric, location and type of tear. Whipstitch, running stitch and backstitch can all be useful for workwear repairs. High-stress areas may benefit from additional reinforcement. Choose a heavy-duty thread appropriate for the fabric and keep the stitches secure without pulling the material so tightly that it puckers.
Can I repair torn work pants without sewing?
Yes. Iron-on patches and fabric adhesive tape can close small tears in a pinch, especially on lightweight jackets or quick field fixes. Clean the area, trim loose threads, and apply the patch according to package directions. That said, adhesive repairs tend to fail faster on heavy-duty fabric that sees repeated stress. For pants and jackets that get worn hard, sewing a patch with a whipstitch or running stitch gives you far better garment longevity.
What should I keep in a heavy duty fabric repair kit for outdoor gear?
A solid kit includes heavy-duty thread in common colors, a pack of assorted needles including a heavy-duty or leather needle, sharp scissors, a mini latch hook for pulling threads, iron-on patches in denim and canvas, and a small seam ripper. Add a thimble and some fabric glue for emergencies. Keeping this kit in your truck or pack means you can handle a tear before it grows, which saves the garment and your wallet.
How do I hide or blend a patch on work pants and jackets?
Match the patch material to the garment fabric first. Cut the patch slightly larger than the tear, then trim the patch edges to follow the fabric weave or grain line. Use thread that matches the original garment color, and sew with small, even stitches along the patch edge. On denim, place the patch on the wrong side of fabric and stitch from the front so the repair looks like top stitching. A well-matched patch can be nearly invisible.